GitHub Account
Follow these instructions to set up your github account.
1. Create a GitHub account
Go to github.com. link Click on the Sign up button and follow the instructions to create your account.
2. Install GitBash for Windows
Go to https://git-scm.com/downloads. link Select the Windows version and follow instruction to download. You can select the default options throughout the installation wizard.
3. Authentication
Now that you have your Github account created, the first step is to connect your machine to your Github account through an SSH key. With an SSH key, Github is able to authenticate you automatically every time you try to manipulate your repository without the need to provide your username or password, which is super convenient. To create an SSH key, simply follow the steps outlined below:
- Launch Git Bash.
- Type the following, replacing “
" with the email address that is linked to your Github account, and hit Enter:
ssh-keygen -t rsa -b 4096 -C "<your email address>" serve
This will generate a new SSH key.
- Next, you will be prompted to enter a directory to save the key. I simply press Enter to accept the default location, which is a .ssh folder in the home directory. In other words, you will be able to locate the key in “~/.ssh/id_rsa”.
- You will then be prompted to choose a passphrase. I prefer not to have a passphrase; so just press Enter and Enter again to confirm the empty passphrase.
Now, if you navigate to the .ssh subdirectory, i.e., if you run the following in the Git Bash terminal,
cd ~/.sshand then,
lsto the list the contents of the .ssh subdirectory, you should find “id_rsa” and “id_rsa.pub” in the list of contents, where “id_rsa” is the private version of your key and “id_rsa.pub” is the public version of your key. - Finally, you will need to add the SSH key to the ssh-agent, which is meant to help with the authentication process. To do that, first you need to start the ssh-agent, so run the following in the Git Bash terminal:
eval "$(ssh-agent -s)"And then add the key to the agent by running the following in the Git Bash terminal:
ssh-add ~/.ssh/id_rsa4. Add the Key to Your Github Account
The next step is to add the SSH key to your Github account. The first thing to do, is to run the following in the Git Bash terminal:
cat ~/.ssh/id_rsa.pub | clipWhat this does is it copies the public version of your key to the clipboard buffer.
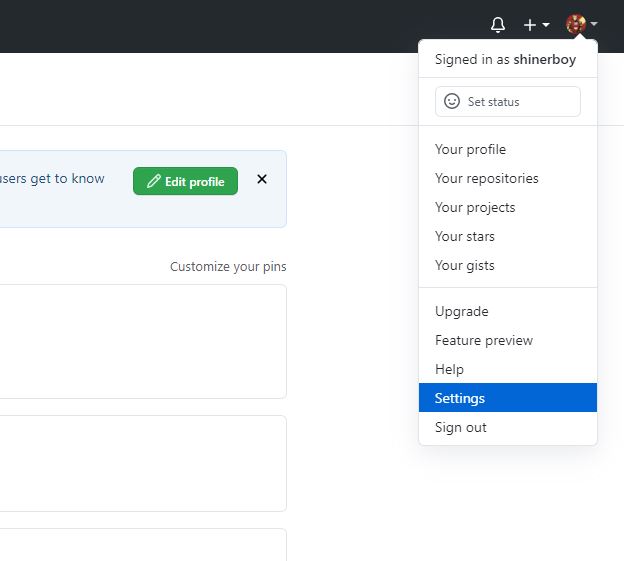
Then, go to your Github account, and click your profile pic in the top right corner of your Github account and select “Settings” from the drop-down menu, as shown below:
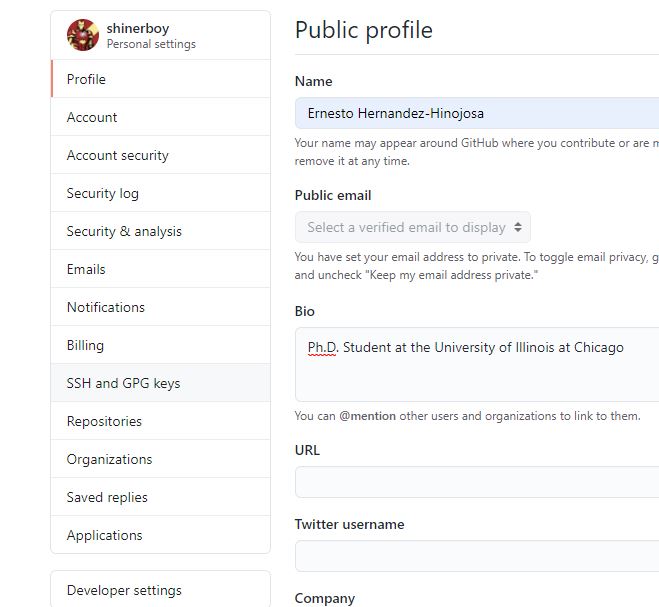
Under Personal settings, select “SSH and GPG keys”, as shown below:
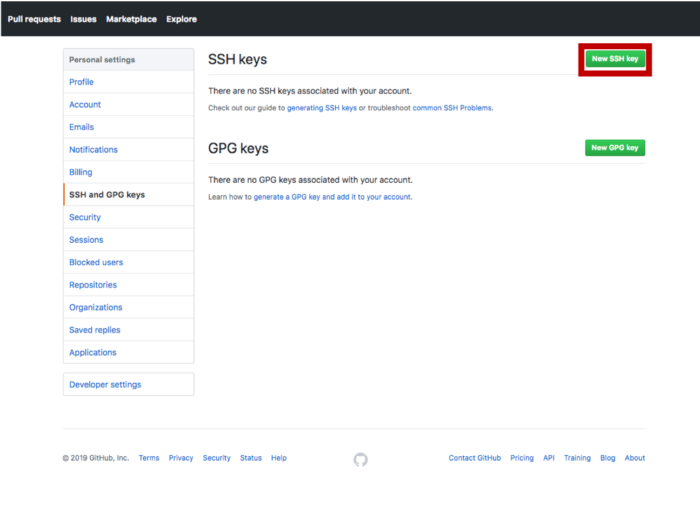
On the next page, click the button to add a new SSH key to your account, as shown below:
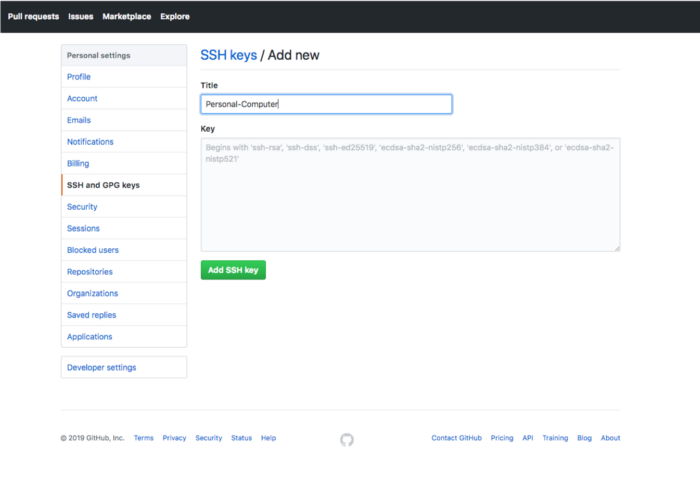
This will start a new form where you will have to add the key and give it a name as well.
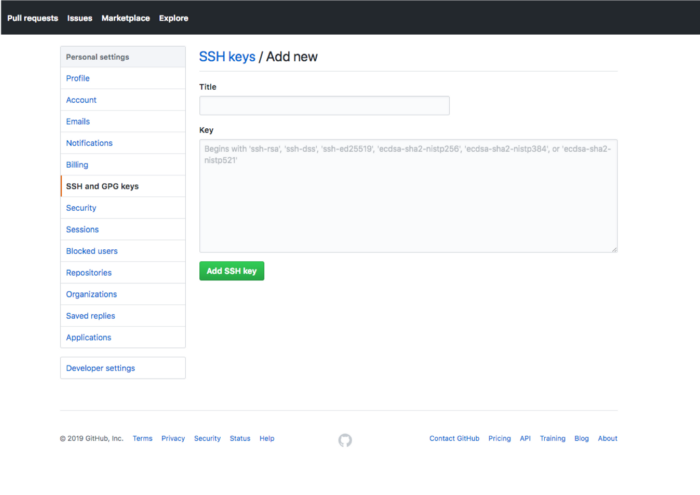
For the title, you give the key a name that describes the machine associated with it. So, if it is your personal computer, then you can name it “Personal-Computer”, as shown below:
Then, select the Key field, and press Ctrl-v to paste the key from the clipboard buffer. The pasted key should have your email address at the end, as shown below:
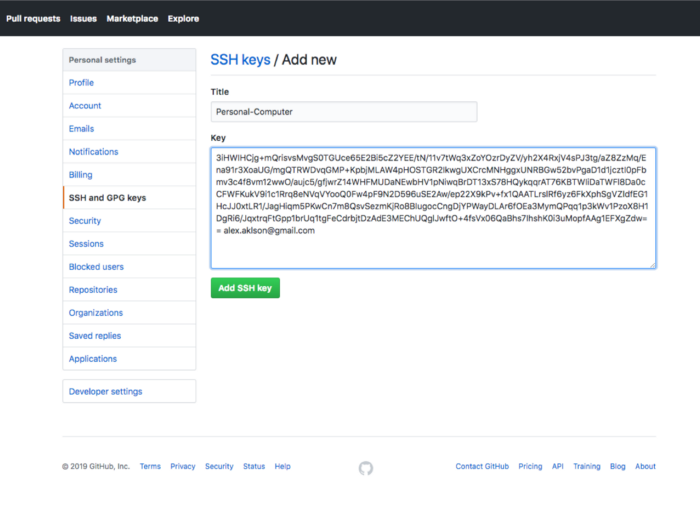
Finally, click the “Add SSH key” to complete the process of adding the SSH key to your Github account.
5. Request access to ramlab github repos
Send an email to ramlab.robotics@gmail.com with your name, UIC UIN#, and github account name or email and wait for access to be grnted before proceeding.
6. Clone the ramlab repository
Now that your machine is linked to your Github account, and Github is confident that any manipulation of any of your repositories coming from your machine would be initiated by you, let’s go ahead and clone the RAMLab Github repository.
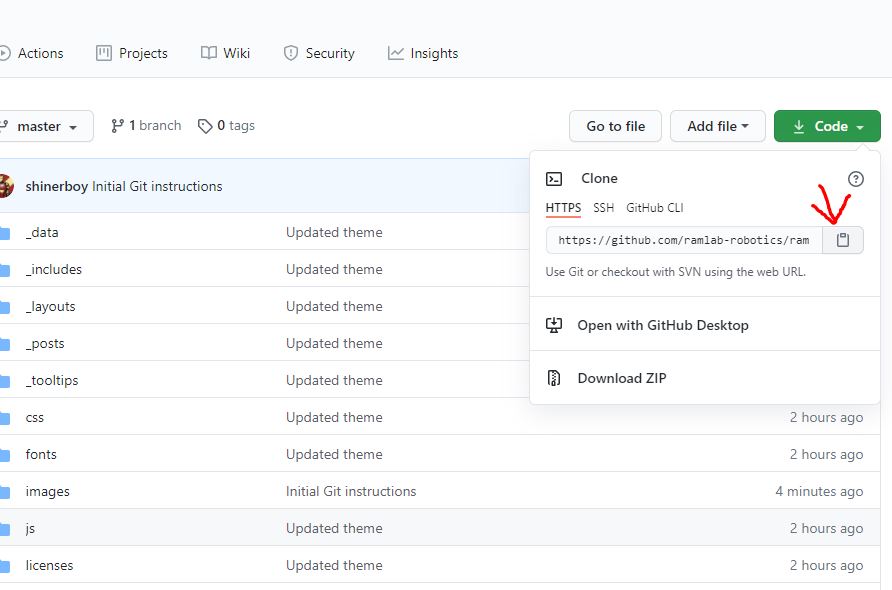
Go to the RAMLab github website (https://github.com/ramlab-robotics/ramlab). link
- Copy the URL of the repo by pressing on the Code green button and clicking on the clipboard as shown below:
- In the GitBaash terminal type
cdto go to your home directory and thencd ~/Documents. - In the Documents folder clone the repository by typing
git clone [URL]replace URL with the URL that was copied from github. - Open your files and check that the repository has been added to the Documents folder.
7. Add a sidebar topic
- Open the repo in your word editor of choice (I recommend Visual Studio Code https://code.visualstudio.com/download. link) The file structure should look like this:
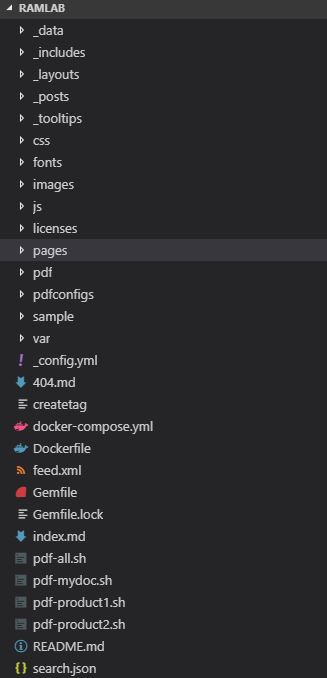
-
Open the
mydoc_sidebar.ymlfile located inside of data>sidebars as shown below: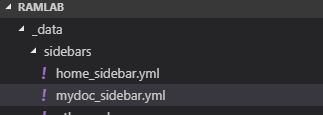
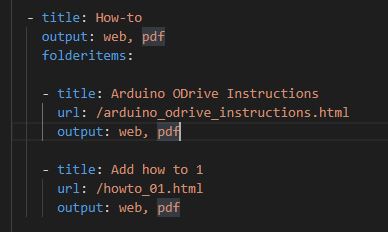
-
Create an entry called How-to with two page items as shown below. Create a url for each page. e.g.
url: /arduino_odrive_instructions.htmlthis will be the url where we will provide the content.
8. Create a page
- Create a file called
mydoc_howto_arduino_odrive.md, for example, inside of pages > mydoc. - Add specified parameters and attributes to the top of the file like this:
---
title: ODrive Arduino Instructions
tags: [tutorials]
keywords:
last_updated: September 24, 2020
summary:
sidebar: mydoc_sidebar
permalink: arduino_odrive_instructions.html
folder: mydoc
---
Make sure the permalink attribute matches the url created for the sidebar and ppulate with the approprote tags, keywords, summary etc.
- Add the documentation below the
---lines.
For guidance, look at the page templates inside of pages > mydoc
9. Push Changes
-
Save the changes made to your files inside of the repo
-
Inside of GitBash
cdinto the repo.cd ~/Documents/ramlab -
Add all changes from the working directory to the staging directory using the command
git add -A -
Commit all changes and add a comment describing the changes made using the command
git commit -m "Created a How-to page" -
Push changes to github using the command
git push -origin master
10. Check changes published
Once you have pushed your changes it may take a couple of minutes for them to be reflected on the website. Visit https://ramlab-robotics.github.io/ramlab/. link or refresh this page to see the changes.